Building a Blog with React-Static and Strapi CMS - Part Two
04 March, 2020 - 5 min read
In the last installment of this series we installed React Static and Strapi CMS into a project directory and added NPM scripts to make working with the back-end and the front-end development servers more manageable.
In this post we are going to take a look at the Strapi CMS admin and do some basic setup so that we have an API to work with in our React Static front-end .
Strapi CMS Initial Setup
In the last post, as a part of the Strapi installation and setup, we created an Admin user by completing the form, entering a username and password. It is usually a good idea to create another non-Admin user at this point but for the sake of brevity we will skip this and use our Admin role exclusively for now.
To begin creating our first content type start the Strapi development server by running develop:yarn:backend from the command line. This will start the Strapi dev server by itself , which is fine because we won't be needing the front-end server until we have a basic back-end configuration. Visit your Strapi admin at http://localhost:1337/admin/ and login as Admin with the username and password you created in the setup procedure.
Content Types
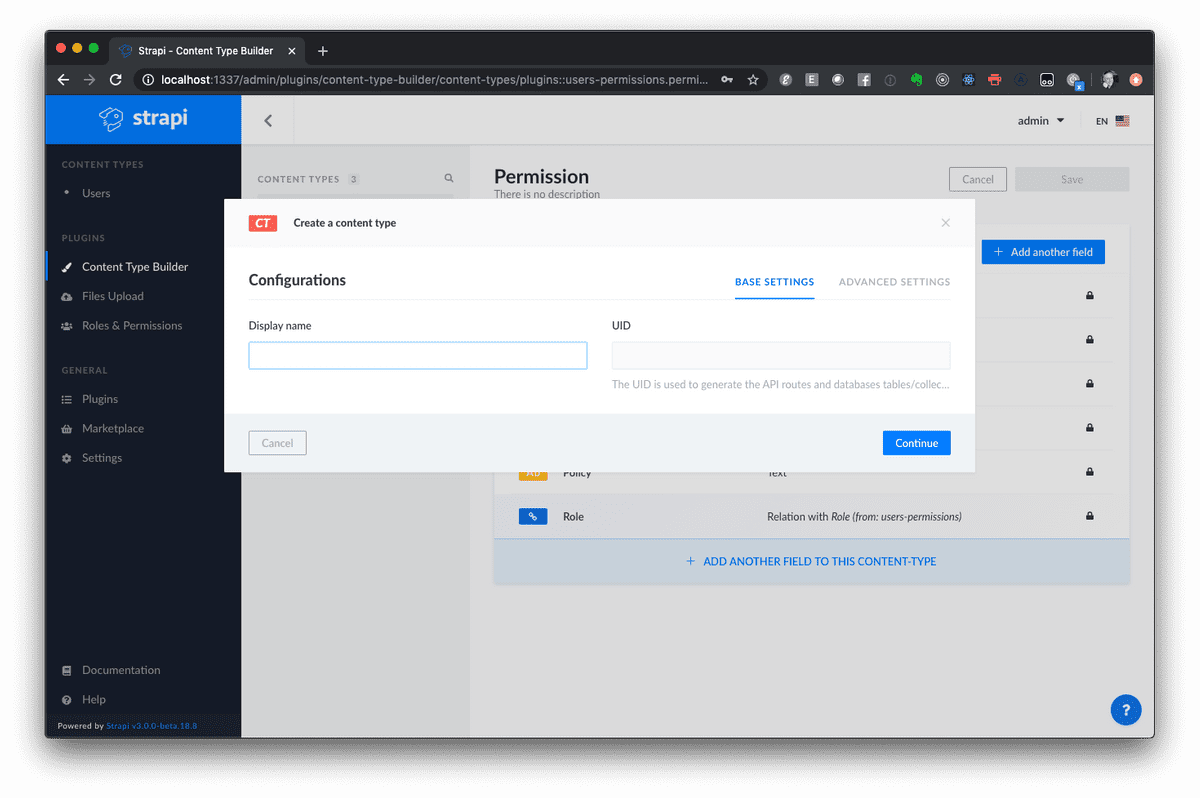
With no configuration steps completed the Strapi admin displays the "Welcome on board!" Greeting and prompts you to create your first content type. Click on the CREATE YOUR FIRST CONTENT TYPE button to navigate to the Content Type Builder. In the grey Content Types menu on the left click the Create new collection type menu item.
For Display name enter 'article' and click Continue. In the Select field pop up that appears let's add the following field types:
- title - type Text, required
- content - type Rich Text, required
- image - type Media (Single image), required
- published_on - type Date, required
To create the 'title' field click on the Text field type selector and enter 'title' in the name field. There are options for short text or long text but we'll keep it at Short since it's onlt a title. In the upper right click Advanced Settings and select the Required field checkbox.
Repeat the above process for the remaining field types by clicking Add another field and selecting the options listed above. Make sure to select the Single image option for the image field.
When all the fields have been added click Finished and then Save to create the Article content type.
The server will automatically restart and afterward the new Article content type will be available for use. At this point you should also see a collection called Articles in the left menu bar. This is where you can add an instance of the newly created Article content-type.
Permissions
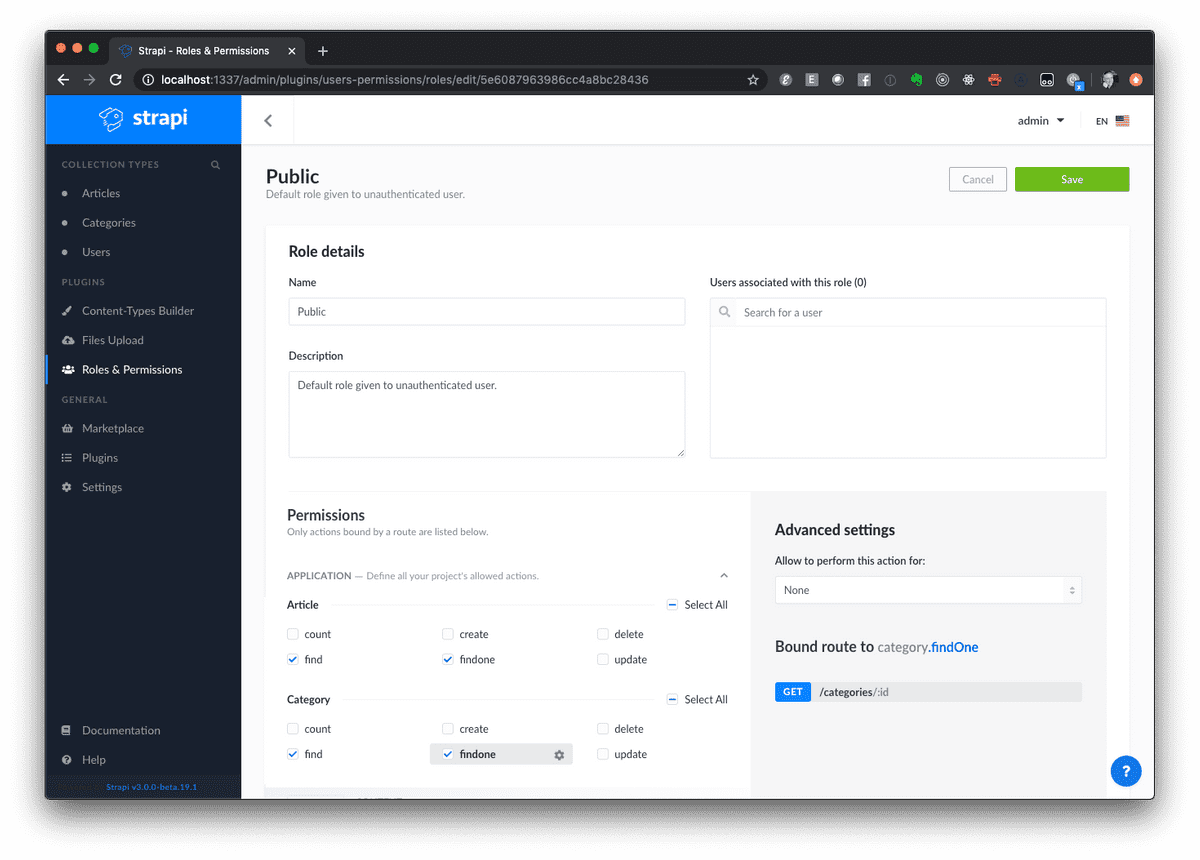
With the Article created the next step is to set appropriate permissions, specifically granting public access. Click on Roles & Permissions in the main menu on the left and then select the Public role. Under Permissions, select the checkboxes for find and findone. This will enable us to query the articles collection via the GraphQL API.
Go ahead and create an article by clicking the Articles menu and then selecting Add New Article. Load up some content set a Published_on date and save the article. It's probably a good idea to add a few more dummy articles for testing. I'll wait here...
APIs
At this point if you visit http://localhost:1337/articles you can see that we already have a REST API endpoint available for out newly created content.
I f you visit http://localhost:1337/graphql and enter the following query you will see that we also have a GraphQL API:
query {
  articles {
    title
  }
}
Here is the result of the query above:
{
  "data": {
    "articles": [
      {
        "title": "Test Article One"
      },
      {
        "title": "Test Article Two"
      }
    ]
  }
}
Adding Categories
Let's add a simple Category content-type that we can assign to our articles to make filtering them easier for the reader.
- create a new content-type by selecting the Content-Types Builder/Create new collection type menu
- Enter 'category' for a Display name and click Continue
- Add a Text field called 'name'
- Click Save, the server will restart...
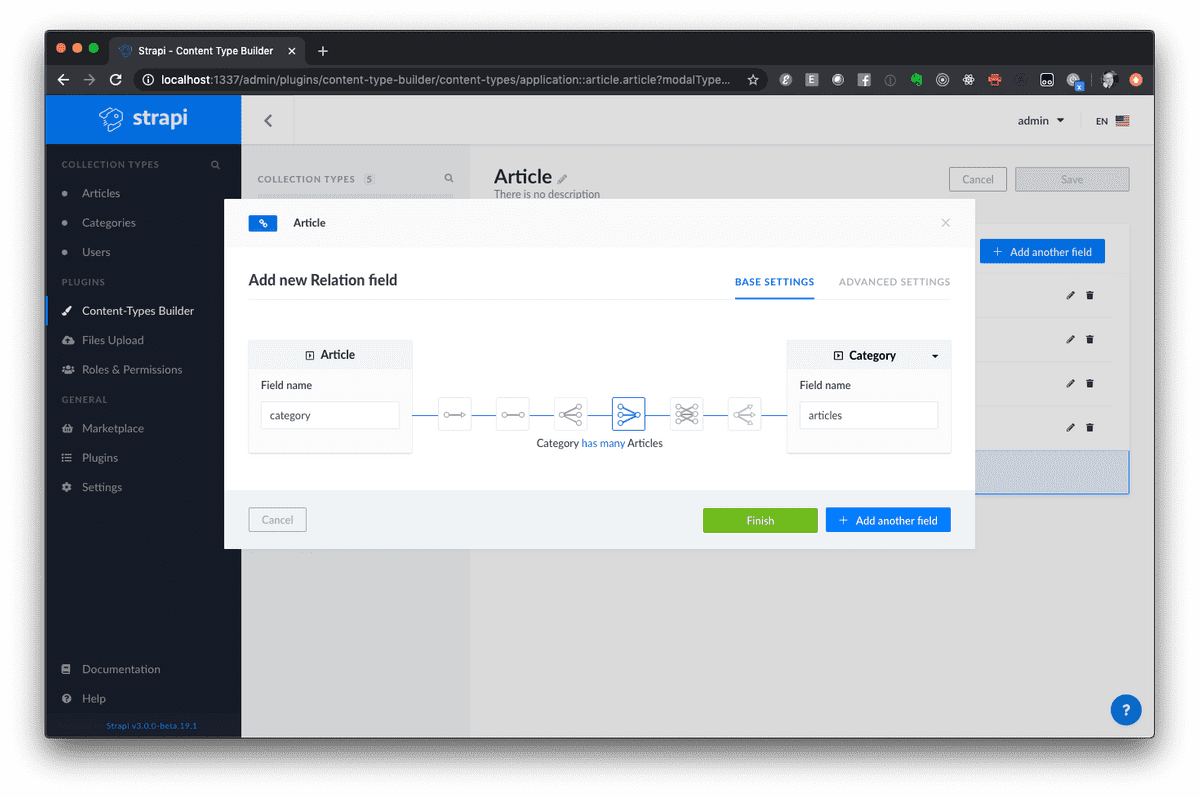
- Click the article type and add a new Relation field specifying that an Article has a 'has many' relationship with the Category content-type and Save. The server will restart...
- Select Roles & Permissions and check 'find' and 'findone' checkboxes for the public role of the category type we created
With these steps completed you can now create and assign categories from the dropdown on the right-hand side of the article editor.
Create a few new categories by selecting the Categories menu and using the Add New Category button. after saving the new categories you can assign them to your articles in two ways:
- Add articles to the category using the dropdown in the Category editor
- Add categories to an article using the dropdown in the Articles editor
Test your new categories with the following query:
query {
  articles {
    title
    category {
      name
    }
  }
}
You should see a result similar to the following:
{
  "data": {
    "articles": [
      {
        "title": "Test Article One",
        "category": {
          "name": "Category One"
        }
      },
      {
        "title": "Test Article Two",
        "category": {
          "name": "Category Two"
        }
      }
    ]
  }
}
Summary
Creating an API for the front end of our application using Strapi is flexible and relativley painless!
In the next installment of this series we will connect the React Static front end to the Strapi backend by adding some queries.


